


How to use lighting to adjust the colour of a White Background
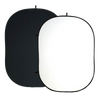
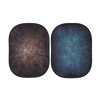
As many photographers know, whether amateur or professional, sometimes renting a studio space can come with limited resources. Many times, you may find that only a White background is available, which may not offer the style you are aiming for with your photography. In this Blog, we take a look at how it is possible to adjust a White background to offer a Grey or Black finish, adding a different style to your photography.
Controlling the Light Fall-Off
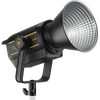
The most important thing to know when trying to achieve this, is that you need to adjust the amount of light the background is receiving. If the background if perfectly and accurate lit up, you would end up with a clean and professional White background in your photography. The way to create a darker background is to reduce the amount of light that falls onto your background during your photography. The simple way to achieve this is to move the light being used to light your subject and background away from the background, restricting the access to light. When trying to create a Grey background, we would recommend moving the light to approximately 3m away from the background. When trying to create a Black background, we would recommend moving the light more than 3m away. The further away you move the light from your background, the darker it becomes, so 3m offers a nice Grey outcome whilst further than this will create a Black finish to your background.
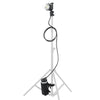
Move the subject closer to the light
So, whilst you need to move the light further away from the background to achieve the darker results, you still need to make sure that the subject is being lit up properly. To do this, you simply need to move the subject closer to the light and further away from the background. By doing this, you will make sure that your subject is still perfectly lit up and the light will then focus more onto the subject rather than the background to help darken the background. For Grey backgrounds, you are able to not have the light as close to the subject, as you still need to make sure that the background receives enough light to still be seen. For Black backgrounds, you need to have the light a lot closer to the subject, so you need them to be lit up properly whilst making sure that the background doesn’t receive much if any light.
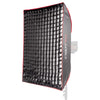
Use modifiers to further control the light
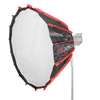
As we are trying to control the amount of light that is falling onto the background, the use of modifiers will drastically help you control the lighting output. For achieving a Grey background, we would recommend using either a large octagonal Softbox or a large umbrella, as this will allow you to better control the light being produce whilst still making sure that background is receiving enough light coverage. For achieving a Black background, you need to make sure that the background receives minimal if any lighting, so we would recommend using the same modifiers, but attaching any honeycomb grids available to further restrict the light spread.
Conclusion
Achieving a Grey or Black background with a white background is possible, you just need the right steps to achieve this. Hopefully, this blog has helped explain what is required to achieve these results.
